---
title: "Getting Started with GladRoTools"
url: https://dmytrogladkyi.com/GladRoTools/getting-started/
date: 2026-05-11
author: Dmytro Gladkyi
tags: ["gladrotools","roblox","macos"]
description: "Install GladRoTools, connect the Roblox Studio plugin, and run your first local asset scan on macOS."
---
**GladRoTools** is a native macOS companion app for Roblox Studio. It connects to Studio through a local TCP bridge and gives you deep visibility into every asset in your place. This guide walks you through setup.
---
## Step 1: Install the App
[](https://apps.apple.com/us/app/gladrotools/id6765629252)
---
## Step 2: Install the Studio Plugin
1. Open GladRoTools.
2. Click the **Settings** button (gear icon) in the bottom-left corner of the sidebar.
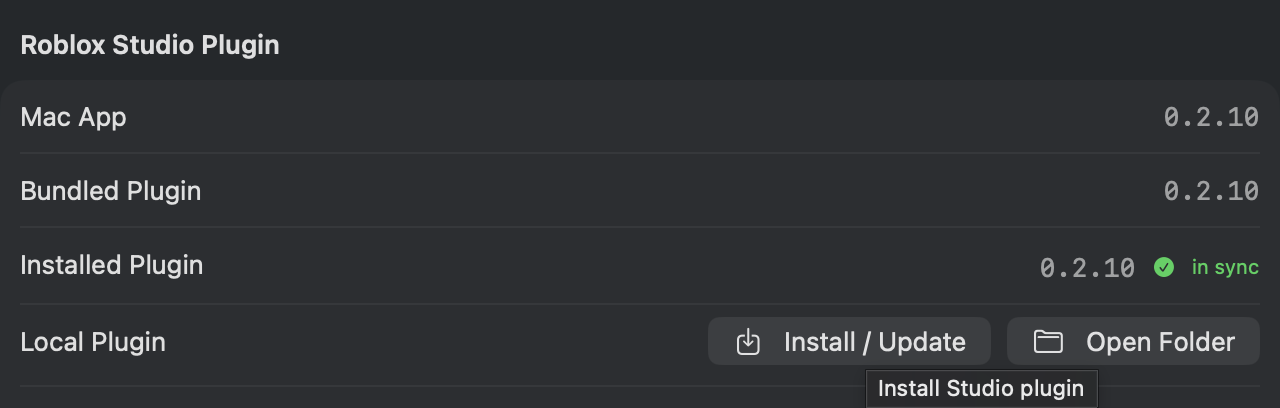
3. Under **Roblox Studio Plugin**, click **Install / Update**.
- The app copies its bundled plugin into Studio's `Plugins` folder.
- The path is shown below the button — you can click **Open Plugins Folder** to verify.
4. The plugin version should match the app version. If it shows a mismatch, reinstall.
---
## Step 3: Start the Bridge Server
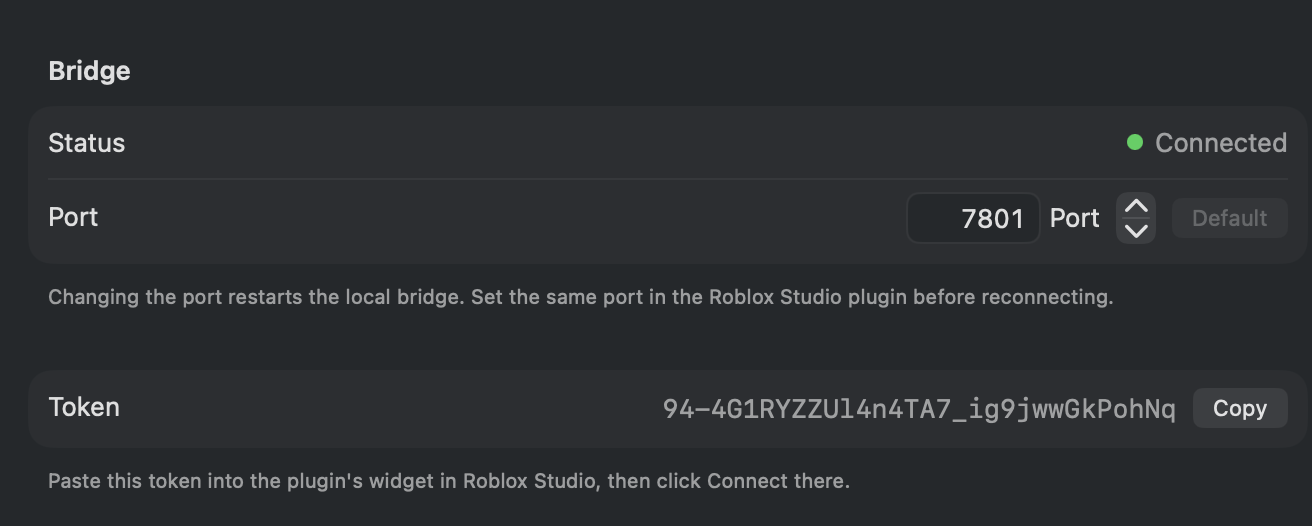
1. In Settings → **Bridge**, check the port number (default: `7801`).
2. The server starts automatically when the app launches.
3. Look at the toolbar badge:
- **Red:** Bridge server is not running.
- **Orange:** Server is running but no Studio plugin is connected.
- **Green:** Plugin is connected and responding.
4. Make sure your firewall allows local TCP connections on the bridge port.
---
## Step 4: Connect from Studio
1. Open any place in Roblox Studio.
2. The GladRoTools plugin loads automatically (it is in the Plugins folder).
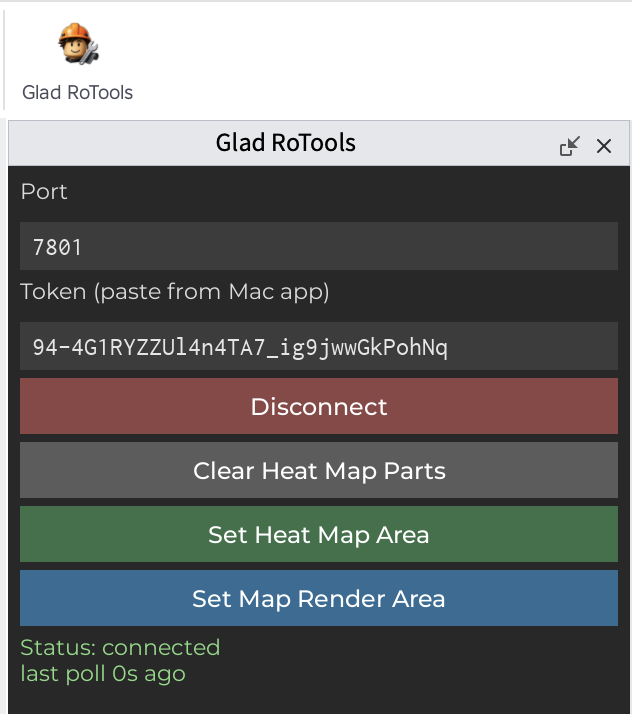
3. In Studio, open the GladRoTools plugin panel (Plugins menu → GladRoTools).
4. The plugin connects to the bridge on `localhost:7801`.
5. The toolbar badge in the Mac app should turn **green**.
---
## Step 5: Sign In with Roblox
1. Open **Settings** (**GladRoTools → Settings...** or **⌘,**).
2. Select the **Roblox** section.
3. Click **Sign In with Roblox** and complete authentication in your browser.
4. The app stores OAuth tokens locally. Your credentials are never seen or stored.
Signing in enables features that download or upload assets — model analysis, image tools, release checklist, and more. Browsing and local inspection work without signing in.
Roblox_Sign_In.png
---
## Step 6: Scan Your Place
1. Click any asset browser in the sidebar — **Decals**, **Sounds**, **Meshes**, or **Animations**.
2. The app prompts the plugin to scan the place for assets.
3. Once the scan completes, you can browse, filter, and inspect every asset.
---
## Next Steps
- [Troubleshoot connection issues](https://dmytrogladkyi.com/GladRoTools/connection-guide/)
- [Learn about Premium features](https://dmytrogladkyi.com/GladRoTools/subscription/)
- [Browse your first place](https://dmytrogladkyi.com/GladRoTools/places/)
- [Prepare images for Roblox](https://dmytrogladkyi.com/GladRoTools/image-tools/)
- [Scan a free model for security issues](https://dmytrogladkyi.com/GladRoTools/model-analyzer/)
 ---
## Step 3: Start the Bridge Server
1. In Settings → **Bridge**, check the port number (default: `7801`).
2. The server starts automatically when the app launches.
3. Look at the toolbar badge:
- **Red:** Bridge server is not running.
- **Orange:** Server is running but no Studio plugin is connected.
- **Green:** Plugin is connected and responding.
4. Make sure your firewall allows local TCP connections on the bridge port.
 ---
## Step 4: Connect from Studio
1. Open any place in Roblox Studio.
2. The GladRoTools plugin loads automatically (it is in the Plugins folder).
3. In Studio, open the GladRoTools plugin panel (Plugins menu → GladRoTools).
4. The plugin connects to the bridge on `localhost:7801`.
5. The toolbar badge in the Mac app should turn **green**.
 ---
## Step 5: Sign In with Roblox
1. Open **Settings** (**GladRoTools → Settings...** or **⌘,**).
2. Select the **Roblox** section.
3. Click **Sign In with Roblox** and complete authentication in your browser.
4. The app stores OAuth tokens locally. Your credentials are never seen or stored.
Signing in enables features that download or upload assets — model analysis, image tools, release checklist, and more. Browsing and local inspection work without signing in.
Roblox_Sign_In.png
---
## Step 6: Scan Your Place
1. Click any asset browser in the sidebar — **Decals**, **Sounds**, **Meshes**, or **Animations**.
2. The app prompts the plugin to scan the place for assets.
3. Once the scan completes, you can browse, filter, and inspect every asset.
---
## Next Steps
- [Troubleshoot connection issues](https://dmytrogladkyi.com/GladRoTools/connection-guide/)
- [Learn about Premium features](https://dmytrogladkyi.com/GladRoTools/subscription/)
- [Browse your first place](https://dmytrogladkyi.com/GladRoTools/places/)
- [Prepare images for Roblox](https://dmytrogladkyi.com/GladRoTools/image-tools/)
- [Scan a free model for security issues](https://dmytrogladkyi.com/GladRoTools/model-analyzer/)